

Hey There! 👋
Thank you for visiting. For those of you who are new here, you’ve definitely purchased some of our blessed mockups, as this is the complete version of the your-guide.txt that we included in the folder you received with our work.
This guide will help you get the most out of your OFFMOCKUPS file. Just follow these simple steps to add your design and make it shine with authentic shadows and reflections.
Important to mention, that we created these mockups using the latest version of Photoshop and will explain the complete tutorial for using them with the same application. So we also expect (if you’re using photoshop too) to use the latest version of photoshop to avoid any misunderstanding in how to use our mockups.
For those of you using alternative applications like: Affinity (Photo / Designer) or Photopea, you can read the tutorial in the article next to this one → ADOBE PHOTOSHOP ALTERNATIVE
Let’s get straight to the tutorial, basically the usage is very simple and easy as we wrote in your-guide.txt but we will provide a detailed explanation and visualization here.
GETTING STARTED
1. REPLACE HERE → the layer you need to double-click to open the embedded file behind it.
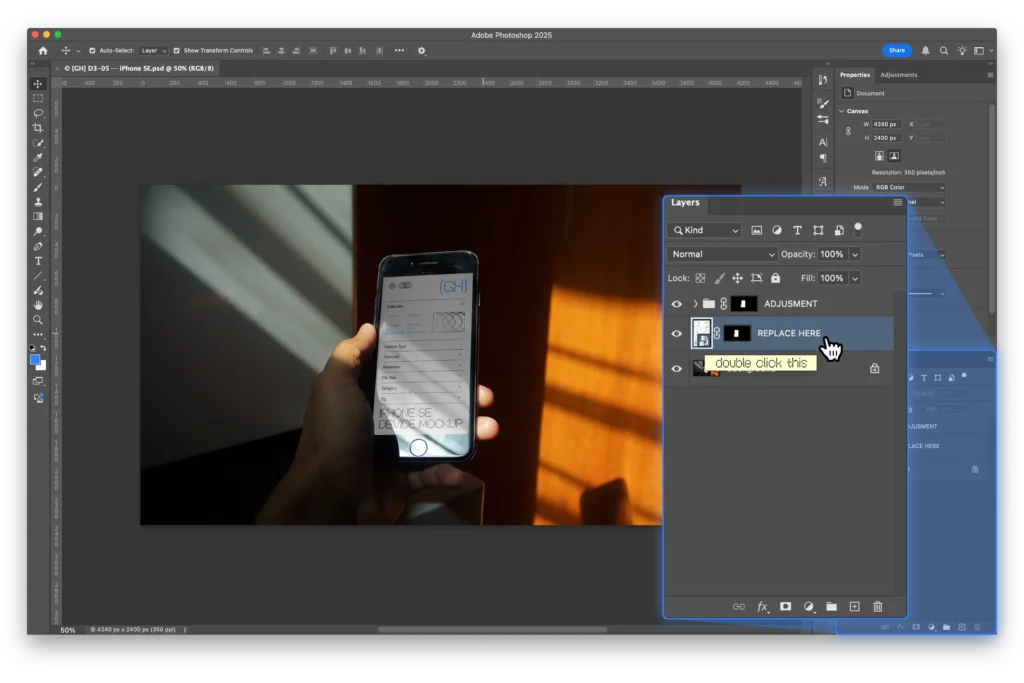
2. REPLACE HERE FILE → after the file opens, you can insert the image or design you want. You can use FILE → PLACE (linked or embedded) or simply drag and drop your file into this file.

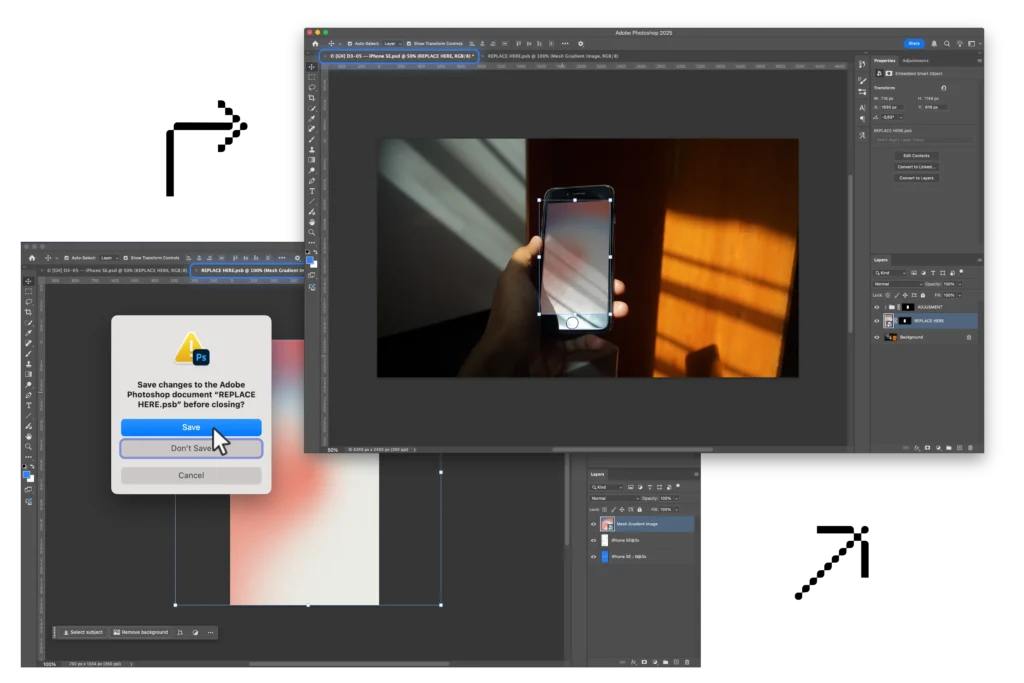
3. SAVE and CLOSE → once your masterpiece is in position (with all layer parts covered), when you press SAVE (or CMD+S or CTRL+S), the main mockup file will automatically display according to the REPLACE HERE file you’ve modified. You can either close the REPLACE HERE file or continue playing around to explore it with your other design work or photos.
MAKE ADJUSTMENTS (MAKE IT MORE REAL)
1. ADJUSTMENT GROUP → consists of SHADOW AND REFLECTIONS settings; to adjust them simply increase or decrease their intensity by setting opacity
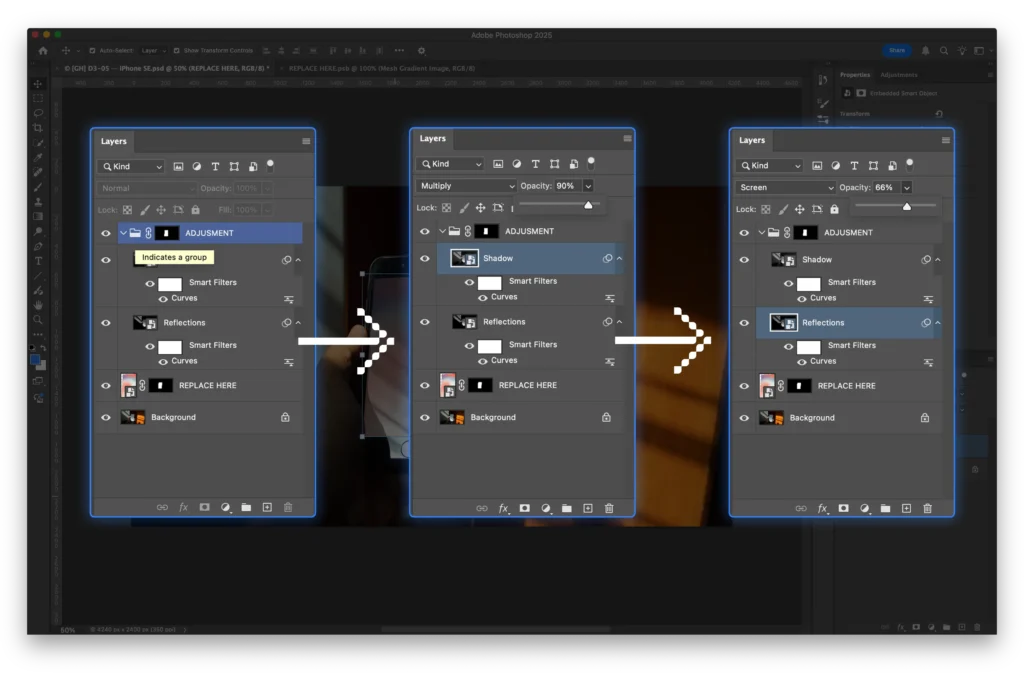
2. SHADOW and REFLECTIONS → the difference between the two:
Shadow: Enhances dark areas and depth in your design. Increasing shadow opacity creates deeper, more dramatic shadows, making your design appear more embedded in the scene.
Reducing opacity lightens shadows for a more subtle effect, like adjusting how your design interacts with the ambient light in the scene. Like in the example, raising or lowering its opacity will be like adjusting brightness on a screen.
Reflections: Controls how your content blends with light interactions in the scene. Higher reflection opacity creates more pronounced highlights and glare effects (great for glossy surfaces), while lower opacity reduces these effects for a more matte appearance.
This setting helps your design appear naturally integrated with the surface textures captured by our camera. As in the example, this setting will affect the contrast of content displayed on the screen.
3. FOR PERFECTIONISTS → if you want to take it even further you have the option to adjust this by customizing the curve. Just in case you want to fine-tune exactly how your design responds to the light and shadow conditions in our photography-captured scene.
QUICK TROUBLESHOOTING
If your design doesn’t appear properly in the main mockup after saving:
⎯ Make sure your design completely fills the REPLACE HERE file canvas
⎯ Check that you’ve saved the REPLACE HERE file before closing it
⎯ Confirm you haven’t accidentally turned off any important layers
Remember, We’ve bottled that perfect moment of light just for your designs – now it’s your turn to create something beautiful within it.
